How to set up Nsight Compute Locally to profile Remote GPUs
Have a remote GPU instance? Want to see some rooflines with Nsight Compute? This tutorial is for you.
0. Set up a remote GPU instance.
Step 0 because I assume you’ve already done this part (using any cloud provider - I’m going with AWS). You just need an SSH-able machine with CUDA installed.
If you are using AWS EC2 like me:
I’m using an Ubuntu image like this on a g4dn.xlarge:

Personally recommend using Ubuntu over Amazon Linux. I couldn’t get nvcc to work on Amazon Linux.
Plus when you run into issues, you’ll find more Ubuntu-related stack overflow posts.
1. Download Nsight Compute on your local machine.
Download link. Nvidia developer account required.
2. Set up remote process.
-
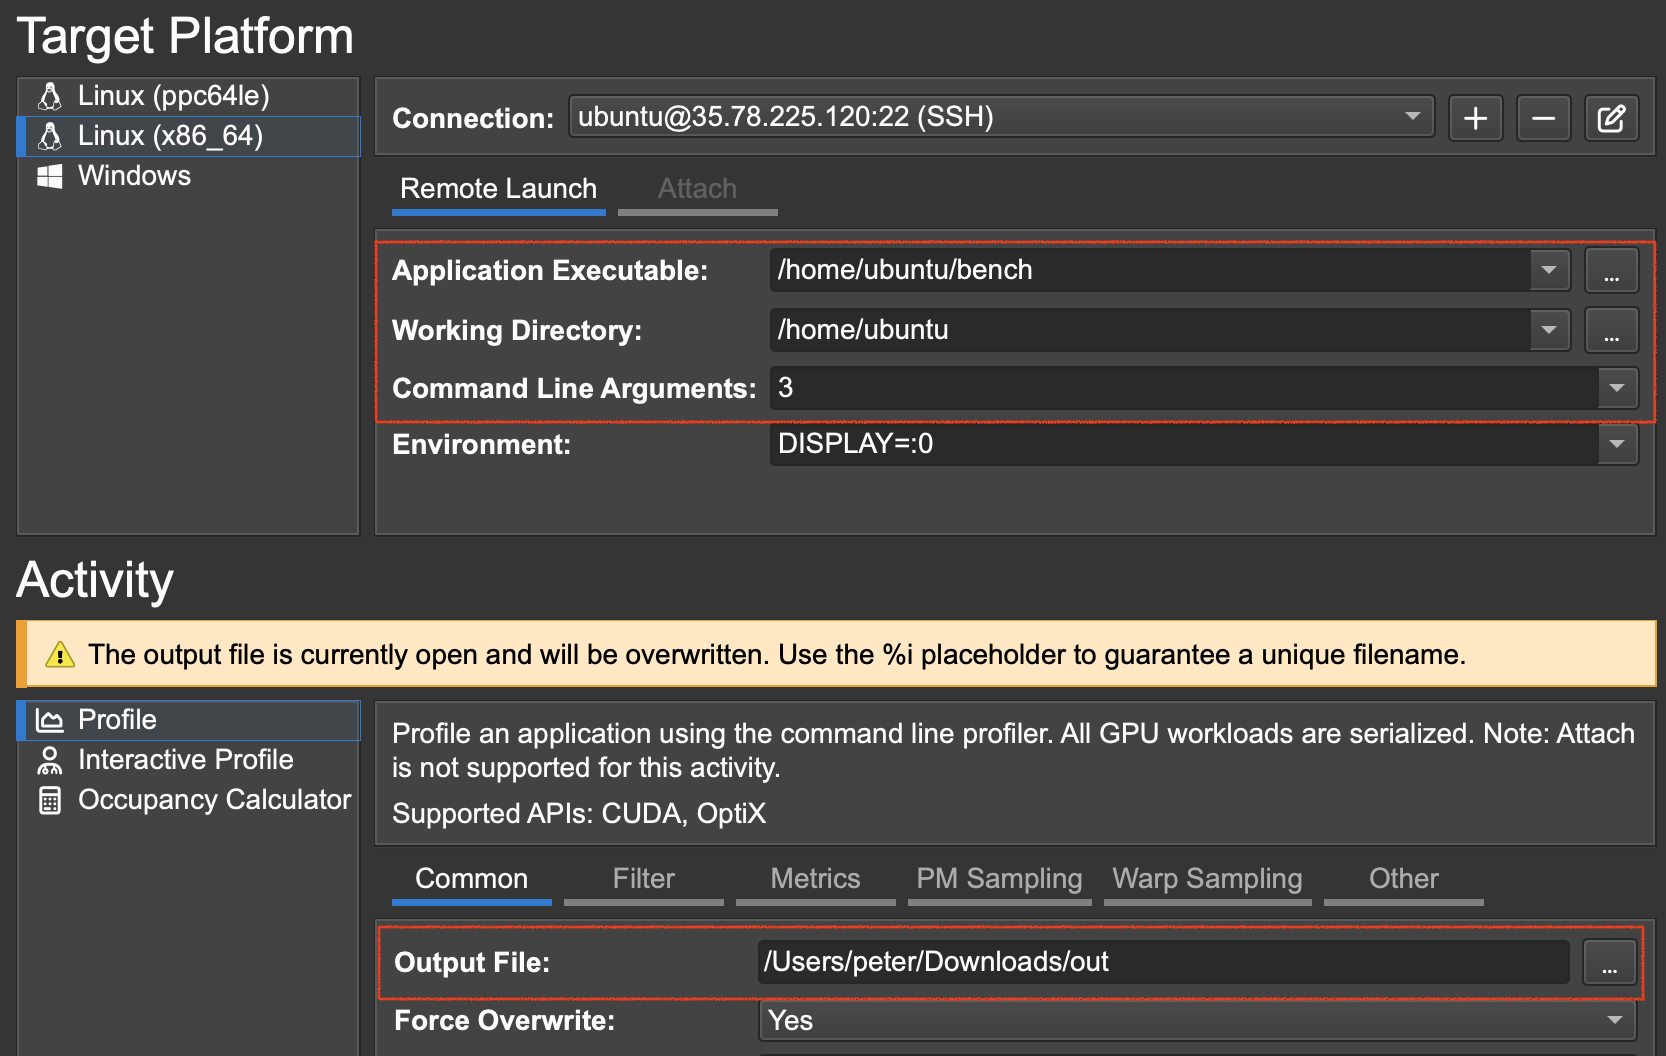
Click Connect and add a new remote connection. Use your remote machine’s config.

- Select the CUDA application you want to profile (the binary executable created with
nvcce.g.benchinnvcc bench.cu -o bench). - Select the output file on your local machine you want to dump the profiler’s result to
(I had to manually create a dummy file called
out).
- Click Launch
If this works for you, then you’re done. Enjoy your rooflines!
If not, and you get a permissions error like this, go to Step 3.
Error: ERR_NVGPUCTRPERM - The user does not have permission to access
NVIDIA GPU Performance Counters on the target device 0.
For instructions on enabling permissions and
to get more information see https://developer.nvidia.com/ERR_NVGPUCTRPERM
3. Give profiling permission to all users on your remote instance.
- On your remote instance, run
sudo vim /etc/modprobe.d/nvidia.conf. Add the following line:
options nvidia NVreg_RestrictProfilingToAdminUsers=0
- Reboot your instance.
- Run
sudo update-initramfs -u -k all
Check out the official guide for more context.
NOTE for EC2 users: When you reboot your instance, AWS will assign a different public IP to your instance. Make sure to update it in your remote connection setting from Step 2.
4. Launch again from Nsight Compute.
Cross your fingers.
5. Enjoy your Rooflines.
